
*This page has affiliate links to Amazon. As an Amazon Associate I earn from qualifying purchases.
My 3-Step Process – Leather boots will stretch out a little bit over time, but that stretching process can take months. The good news, however, is there is a very simple way that you stretch your boot leather for quicker results. Let’s discuss.

I personally have broken in and stretched so many leather boots over the years I can’t even count them all. And there’s one absolutely crucial hack I use to make the process quicker.
Leather boots are stiff when you first get them because the leather is still in its original, untreated form. It hasn’t been bent, flexed, or warmed by your body heat yet.
“I use a simple 3-Step process to stretch out my leather boots – something I call the ‘C-S-W’ process.”
I use a simple 3-Step process to stretch out my leather boots – something I call the ‘C-S-W’ process. It’s very easy and something you can do from home.
Step #1 – Condition the Leather By Doing This
Remember, leather is a natural material that’s strong and durable, and that’s part of what makes it so appealing. But that same strength also means the boot starts off (out of the box) feeling hard and unyielding.
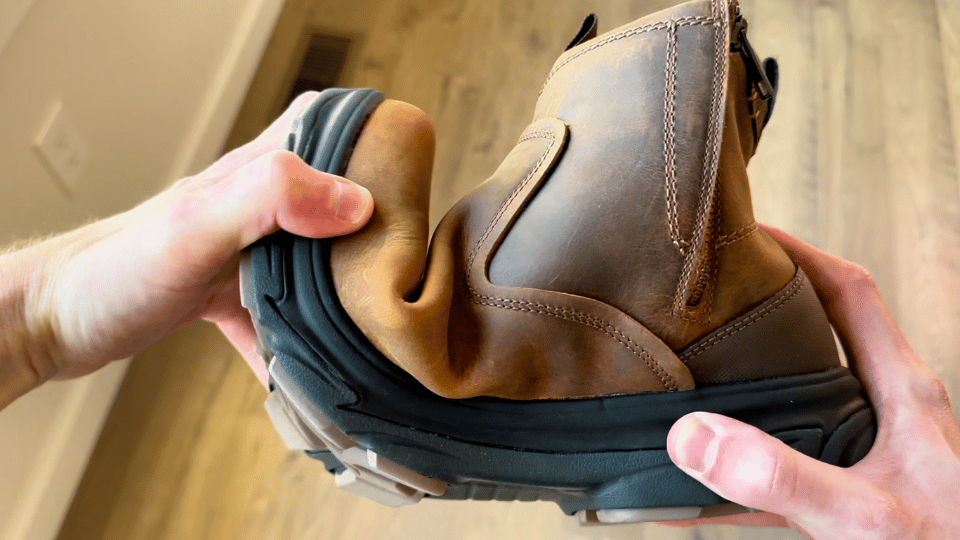
Until you break them in, the leather stays tight and firm, holding the shape it was given in the factory.
That shape is based on something called a last (or a “boot last”). A last is a hard, solid mold that bootmakers use to form the shape of the boot during construction.

The last is what creates the form and fit of the boot, including the curve of the arch, the width of the toe box, the angle of the heel, and the general outline of the foot.
The last is one of the most important parts of bootmaking because it controls how the boot will feel and fit once it’s done.
“My ‘C-S-W’ process to stretch out leather boots is simple. You can use this process too. Here’s how:”
The problem is that companies use standardized lasts, which are designed to fit what they consider to be an average foot (not your foot).
These lasts are mass-produced and used across many different sizes and styles to keep manufacturing consistent and costs down. But the truth is, there is no such thing as a truly average foot.

Foot shapes vary a lot from person to person, even if their shoe size is technically the same. Your foot might be wider in the front and narrower at the heel. Someone else might have a high instep and a low arch.
Some people have flat feet that need more support along the bottom. Others have extra room between their toes or longer second toes (you get the point).
“The first part of my process “C” stands for Conditioning the Leather.”
These differences completely change how a boot feels when you wear it. And since the boot was built around a general mold rather than your specific foot, it’s common to feel discomfort, pinching, or slipping in certain areas.
But, there are easy ways to fix this issue and stretch your boot to fit your foot. As I said, I like to use what I call the C-S-W Method.
The first part of my process “C” stands for Conditioning the Leather.
“Conditioning the leather is critical because it helps soften the leather and prepare it to stretch.”
Conditioning the leather is critical because it helps soften the leather and prepare it to stretch. Not only does this help stretch the leather, it also helps prevent the leather from being damaged by the stretching process.
What is the best type of boot conditioner? There are many options on the markets, including conditioners, oils, etc.
“I like to use the Bickmore Boot Stretch Conditioner because it is specifically designed to help stretch leather.”
I’ll just tell you what I use – I like to use the Bickmore Boot Stretch Conditioner – Click here to view this Bickmore Boot Stretch Conditioner available at Amazon (paid affiliate link takes you to Amazon.com).
Why do I use this specific conditioner?
“Remember, applying this conditioner is just the first step. The second step (and third step) are even more important to get proper stretch and fit.”
I like it because it is actually made for stretching leather. It is NOT designed as a catch-all conditioner to treat and repair leather, it is specially formulated to stretch out firm, tight fitting footwear. To me, that makes it worth it, and I have had good results with this conditioner.
Remember, applying this conditioner is just the first step. The second step (and third step) are even more important to get proper stretch and fit.
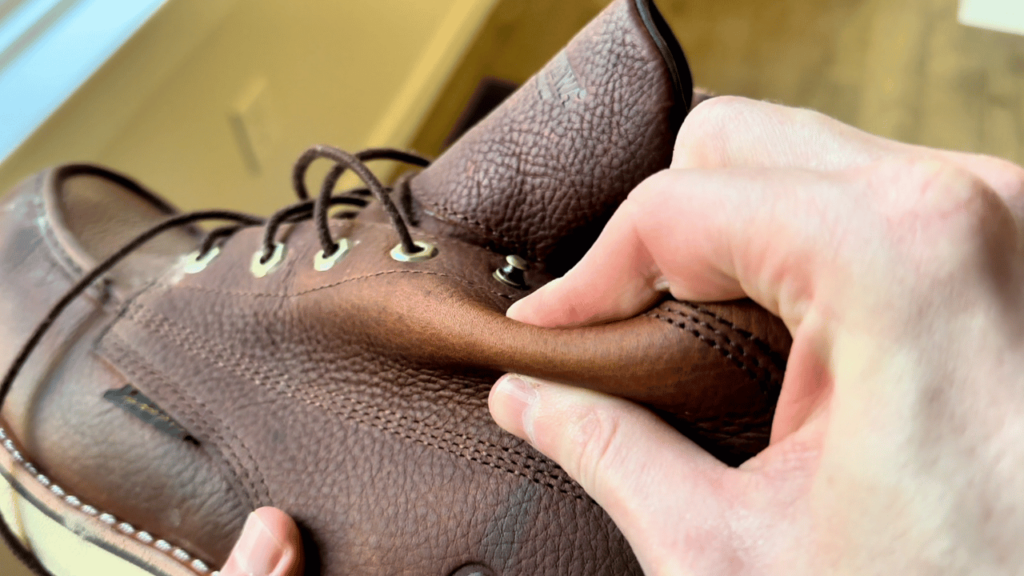
“I apply the conditioner evenly over the areas that feel tight— for me that is usually around the toe box. For you, this may be a different area.”
Regarding the conditioner, I apply it evenly over the areas that feel tight— for me that is usually around the toe box. For you, this may be a different area.
You can apply it to a larger area, just make sure to follow the directions (you are applying it to the inside of the shoe). Again, I usually just apply it to my trouble spots.
This Bickmore leather stretch is crucial because it makes the rest of the stretching process more effective and less stressful on the leather. Think of this step as “prep” for the rest of the stretching process.
Conditioning the leather gives it a head start. You don’t want to force stiff material to move without preparing it first. If you try to stretch dry, unconditioned leather, you can cause damage.
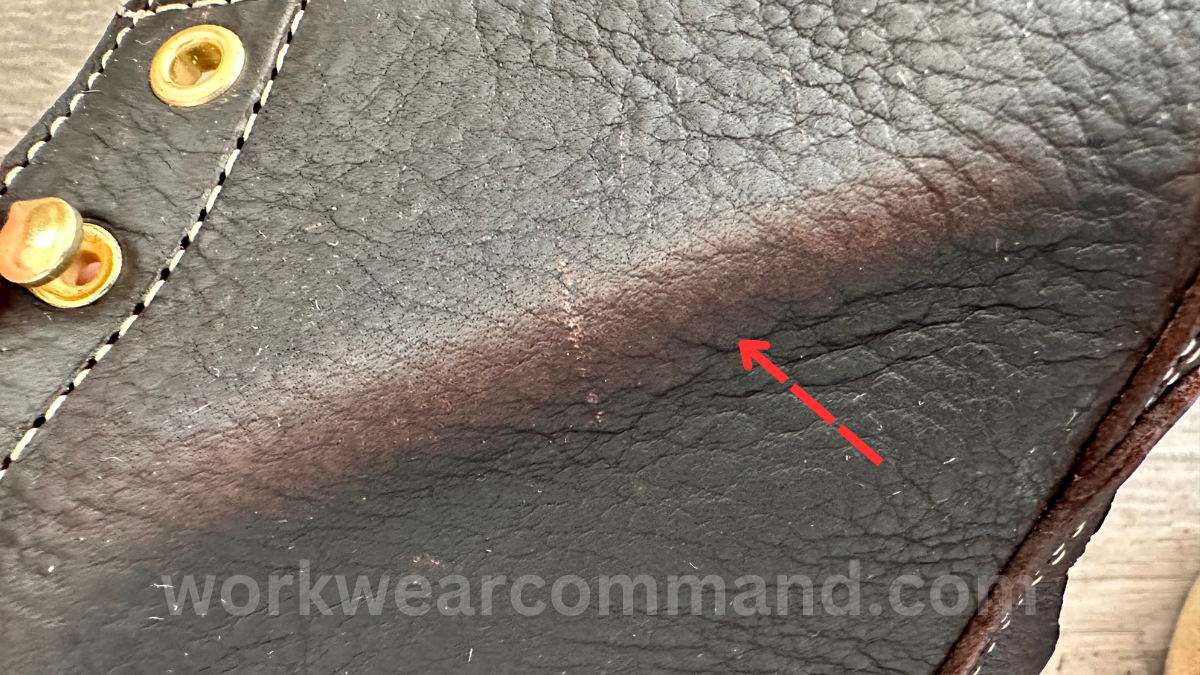
“Once the conditioner has soaked in, the leather becomes more receptive to shaping.”
The seams can take on too much strain, or the surface might crease in odd ways. That’s why this step comes first. Once the conditioner has soaked in, the leather becomes more receptive to shaping.
It’s easier to guide it where you want it to go, which sets the foundation for the next step of the process.
“Step #2 in my process is the most important step – it’s where the magic happens.”
Step #2 in my process is the most important step – it’s where the magic happens.
But before we move off conditioner, it’s important to remember that even once your boot is fully stretched and broken in, you still need to regularly condition or oil it.
Leather is a natural material, and over time it can dry out, lose its flexibility, and start to crack if it’s not maintained.
A dried-out boot can shrink slightly or stiffen up again, undoing some of the comfort you worked for during the break-in process.
“It’s important to remember that even once your boot is fully stretched and broken in, you still need to regularly condition or oil it.”
You don’t need to condition your boots constantly. For most people, applying a boot conditioner or oil once every 6 to 12 months is enough.
After my boots are stretched, I do NOT keep using the same Bickmore stretch conditioner. Instead, that’s when I start using my favorite all-purpose boot oil, which is Huberd’s Original Shoe Oil. Here’s mine:

In my experience, this is the best oil for preserving leather on a shoe or boot.
Click here to view Huberd’s Original Shoe Oil available at Amazon (paid affiliate link takes you to Amazon.com). Overall, how much you condition your leather depends on how often you wear them and what kind of elements they’re exposed to.
If you wear your boots daily or you’re walking through dirt, dust, or dry air, you may want to condition them closer to the 6-month mark.
“In my experience, this is the best oil for preserving leather in a shoe or boot.”
If they sit in the closet most of the year, once a year is probably fine. The goal is to keep the leather nourished so it stays soft and strong without becoming overly oily or sticky.
If you live in a wet or humid climate, or if your boots often get wet, you’ll need to condition them more often. Water pulls the natural oils out of leather, and if it isn’t replaced, the leather will dry, harden, and start to crack.
“Now, for the second step of my C-S-W process for stretching leather boots. The “S” stands for ‘Stretching’.”
Wet boots that are left untreated can also become stiff and uncomfortable over time. In those cases, it’s a good idea to condition your boots every 6-8 weeks, especially if they’ve been soaked or dried out in the sun.
Step #2 – Stretch the Leather By Using This Tool
Now, for the second step of my C-S-W process for stretching leather boots. The “S” stands for “Stretching”.
I use a very specific device to stretch the boots.
“I use a very specific device to stretch the boots.”
At first, I tried using homemade methods to stretch my boots. I stuffed them with rolled-up socks, wrapped plastic bags around soup cans, and even tried using a wooden spoon handle to push out tight spots.

None of it worked – at least, not in the way I needed. If you want to try something like that, go ahead. I’d say you shouldn’t, and instead just use the device that I use (or something like it).
Those homemade items, most of the time, I ended up with uneven results, or I felt like I was forcing the leather in ways that didn’t feel good for the boot.
“Ultimately, I gave in and purchased a simple boot stretcher device.”
Ultimately, I gave in and purchased a simple boot stretcher.
The boot stretcher I like to use is the FootFitter Premium Professional Boot Stretcher – Click here to view this FootFitter Premium Professional Boot Stretcher available at Amazon (paid affiliate link takes you to Amazon.com).
This is the tool that actually forms my leather boots, and stretches them, in the ways I need to make them comfortable (and skip the months-long break-in process).
“This boot stretcher tool helps form my leather boots, and stretches them, in the ways I need to make them comfortable (and skip the months-long break-in process).”
This is a sturdy device. It isn’t one of those cheap plastic tools you see online—it’s solid German beech wood, mad with a steel shaft and a polymer handle that’s made to hold up under added pressure.
It also comes with metal spot stretching plugs, which are great for problem areas like bunions or anywhere the boot rubs (my boots tend to rub on the outside small toe area). The key is patience.
The process of stretching leather boots takes time, and how long it takes depends on the type of leather, the design of the boot, and how much change you’re trying to make.
Some boots only need one session in the stretcher followed by some light wear to finish molding them. Others may need to be stretched more than once, especially if they’re made from thick or high-quality leather that’s slow to soften.
“In most cases, I leave the stretcher in for about 6 to 12 hours per session.”
In most cases, I leave the stretcher in for about 6 to 12 hours per session. It’s better to go in small steps and repeat as needed rather than trying to overdo it in one go.
During the stretching process, the boot will start to change shape. You might notice that the toe box opens up or that tight spots feel less painful.
“During the stretching process, the boot will start to change shape.”
In my experience, it’s a subtle difference at first, but it builds over time. You’ll usually feel it more than you’ll see it. The leather begins to respond to pressure and remembers the shape better with each session.
I always test the boot after stretching by putting it on with the socks I plan to wear most often. If it still feels snug, I either wear it a bit more to help the break-in continue or repeat the stretch if needed.
You’ll know when to stop once the boot stops fighting back. It should feel snug but not painful, and your foot should slide in without resistance. The pressure points that once felt tight will either be gone or far more tolerable.
If the leather starts to feel loose or sloppy, that’s a sign you’ve stretched too far. In that case, stop and let the boot settle for a few days before doing anything else.
“The third step of my process is “W”, which stands for Wear. This is when the real shaping begins.”
Most of the time, one or two stretching sessions followed by the third step in my process will be enough to stretch the boot to the point of feeling comfortable.
Step #3 – The Final Step To Stretch the Leather
The final part of my process is “W”, which stands for Wear. This is when the real shaping begins.
“After I’ve conditioned and stretched the boots, I start wearing them to let the leather learn my foot.”
After I’ve conditioned and stretched the boots, I start wearing them to let the leather learn my foot.
I usually start slow by wearing them around the house with medium or thick socks. This adds a little extra pressure to help the leather continue adapting without pushing the seams too hard.
| Step | What You Do | Why It Matters | Tools/Materials |
|---|---|---|---|
| Condition | Apply leather conditioner to soften tight areas. | Prepares leather to stretch more safely and evenly. | Bickmore Boot Stretch Conditioner |
| Stretch | Use a boot stretcher to gently widen or shape the boot. | Expands the leather in key areas without damaging seams or structure. | FootFitter Boot Stretcher |
| Wear | Wear the boots in short sessions with thick socks. | Helps the leather mold to your unique foot shape with natural heat and pressure. | Thick socks, patience. |
The warmth from my foot, the movement as I walk, and the natural pressure all help the leather start to mold. I focus on short sessions—maybe 30 minutes to an hour at first—because I don’t want to create new pressure points or cause the leather to crease in strange places.
After each wear, I give the boots time to rest. That resting period helps the leather hold its new shape and adjust gradually. It’s not about rushing—it’s about letting the material work with your foot in a natural way.
“The type of job you have or the kind of boot you’re breaking in can change how this step plays out.”
The type of job you have or the kind of boot you’re breaking in can change how this step plays out. If you’re wearing work boots on a job site with lots of walking, bending, or lifting, the break-in process might go faster (but you’ll want to ease into wearing them on the job).
A few hours of wear at home can save you from painful blisters or sore feet during a long shift. If the boots are more casual or meant for light outdoor use, you might be able to stretch out the break-in over weekends or slow days.
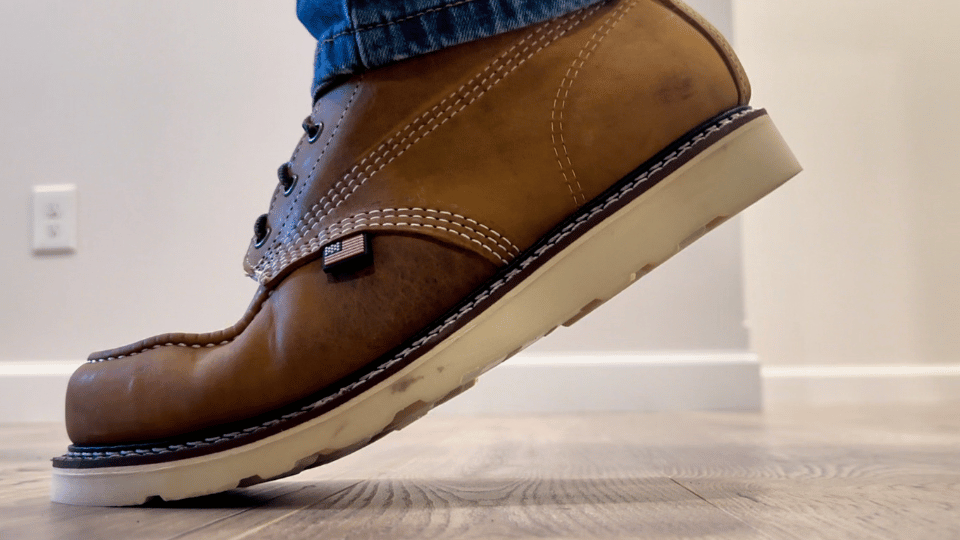
“Over time, the leather stops feeling stiff and starts moving with you.”
For hiking boots, the terrain and pressure points matter more. I’ll walk on different surfaces—even gravel or slight hills—to help the boot adjust to the kinds of movements it will need to support later.
On the other hand, if you’re dealing with dress boots or heritage-style boots with hard soles, the leather might take longer to soften and respond. In those cases, slow and steady wear is even more important to avoid cracking or damaging the upper.
Over time, the leather stops feeling stiff and starts moving with you. You’ll notice the heel slipping less, the toe box feeling roomier, and the boot flexing right where your foot bends. That’s when you know the process is doing what it’s meant to do.
The boots stop feeling like something new and start feeling like they belong on your feet.
Products I Use to Stretch Leather:
Leather Conditioner for Stretching – I like to use the Bickmore Boot Stretch Conditioner – Click here to view this Bickmore Boot Stretch Conditioner available at Amazon (paid affiliate link takes you to Amazon.com).
Shoe Oil – The shoe oil I use to maintain my leather over years of use is Huberd’s. Click here to view Huberd’s Original Shoe Oil available at Amazon (paid affiliate link takes you to Amazon.com).
Boot Stretcher Kit – The boot stretcher I like to use is the FootFitter Premium Professional Boot Stretcher – Click here to view this FootFitter Premium Professional Boot Stretcher available at Amazon (paid affiliate link takes you to Amazon.com).